Just Kitting Studio Items for Sale

Showing posts with label Tags. Show all posts

Thursday, February 19, 2015

My tag class for April through June with Julie Nutting dolls


I love playing with my Julie Nutting doll stamps!!!!!  These are for my upcoming tag class at Busy Bees Studio in Newbury Park.  The class is March 25th if you would like to attend.  
These are the April, May and June tags.  
The first is an Easter theme using Doodlebug Easter paper,  
The second one is April showers bring May flowers also with Doodlebug ,
And the last tag  is the Beach Boy with Bo Bunny.  
The little girl and boy doll are done with stamps.  
The stylin rain girl is done with Julie Nutting die cuts and the umbrella cut with the Silhouette.  

Thursday, March 28, 2013

Totally Tags N" ATC's "The Cross"


Here is my tag for the cross tag today.  The background is a distressed piece of purple.  On top is brown embossed with wood grain.  Then burlap The cross is from Easter 2010
1 Peter 1:3 
Praise be to the God and Father of our Lord Jesus Christ! In his great mercy he has given us new birth into a living hope through the resurrection of Jesus Christ from the dead... (NIV)
Please come by and see all the other wonderful tags my DT sisters have made at http://www.mypapercrafting.com/ My Paper Crafting
May you each have a blessed Easter and remember the true meaning  with your family and friends.  


Thursday, February 21, 2013

Totally Tags n' ATC's - Something new at My Paper Crafting


I am so excited that Melin and the Design Team at My Paper Crafting  are starting a new post for Thursdays Totally Tags n' ATC's. Starting today February 21 Thursdays will be  the day to explore different themes, elements, techniques or embellishments.   This week we are using ribbon on our tags and ATC's.  There is no restriction on what tools  are used to create these tags or ATC's.    It could be a die cut machine, punches, stamps, etc.  The sky is the limit.  However if the Design Team uses Digis or SVG's they will be from Paper Crafting World.  

As a side note, if you don't know what an ATC card is, here is an 
interesting definition from Wikepedia.
Artist trading cards (or ATCs) are miniature works of art about the same size as modern trading cards baseball cards, or 212 by 312 inches (63 mm × 89 mm),[small enough to fit inside standard card-collector pockets, sleeves or sheets.[The ATC movement developed out of the mail art movement and has its origins in Switzerland. Cards are produced in various media, including dry media (pencils, pens, markers, etc.), wet media (watercolor, acrylic paints, etc.), paper media (in the form of collage, papercuts, found objects, etc.) or even metals or cloth. The cards are usually traded or exchanged. 

I will be coordinating the post for Thursday and can hardly wait to see what all the awesome Design Team members create.  I for one have not always been a big tag maker but have recently started exploring tags as a new way to express creativity, try new techniques and use my scraps.  
I hope you will join us each Thursday here at My Paper Crafting for 
Totally Tags n' ATC's.
So here is my project and please check out the other DT projects. 


Paper- A Lady's Diary Graphic 45 
Tim Holtz filmstrip
Misc, Bottle cap and stickers 
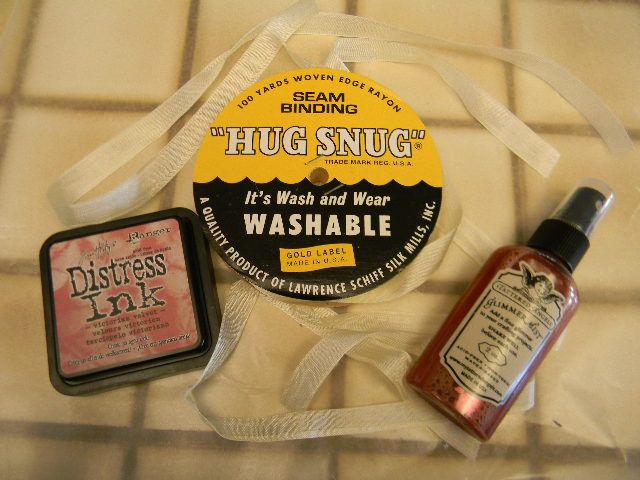
Hug Snug Seam Binding (Amazon  100 yards less than $10) and Rosette 
Tattered Angel Glimmer Mist- Creme de Rouge and Vintage Pink
Tim Holtz Distress Ink -Vintage Velvet 

Tutorial for Dying Seam Binding 
I use the Hug Snug Seam Binding that can be bought on Amazon and other sites (link above) 
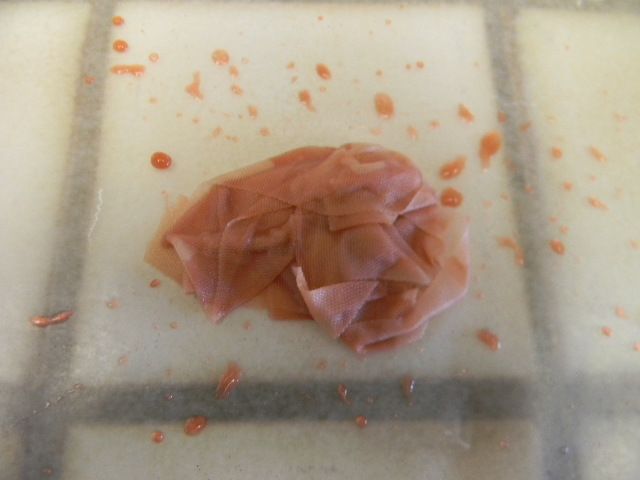
You can use Glimmer Mist or Inks to color the ribbon.  


Place a mat or wax paper on your work surface.  
For Glimmer Mist spray color on to mat and soak cut pieces of ribbon with spray until saturated.  
You can add more spray if you need it.  
I highly recommend plastic gloves to keep your hands clean.  
To use Distress ink rub the ink until ribbon is covered.  

Crumple up the ribbon and allow to dry to keep crimped look. If you need it right away you can dry with hair dryer or heat embosser but it will not be as crinkled.

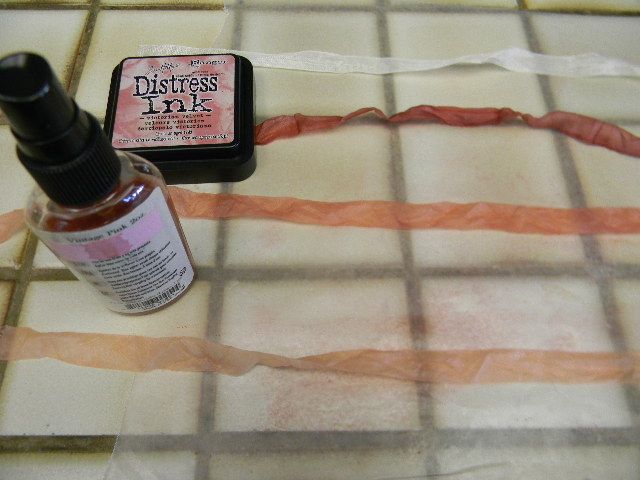
Here are the ribbons I did top is cream ribbon no ink.
The next one was done with Distress ink. which is darker.
The other two are Glimmer Mist spray.


For my actual ribbon on my project I used the lighter color sprayed ribbon and then inked some with Distress Ink-hence the dark and light hues. The rose was cut from a yard I bought of the roses and lightly sprayed with Vintage Pink Glimmer Mist. 
It is really fun to experiment and since you get 100 yards for less than $10 it is cheap.
You can also use Alcohol Inks.

Wednesday, June 13, 2012

Cooking with Cricut- Father's Day Gift

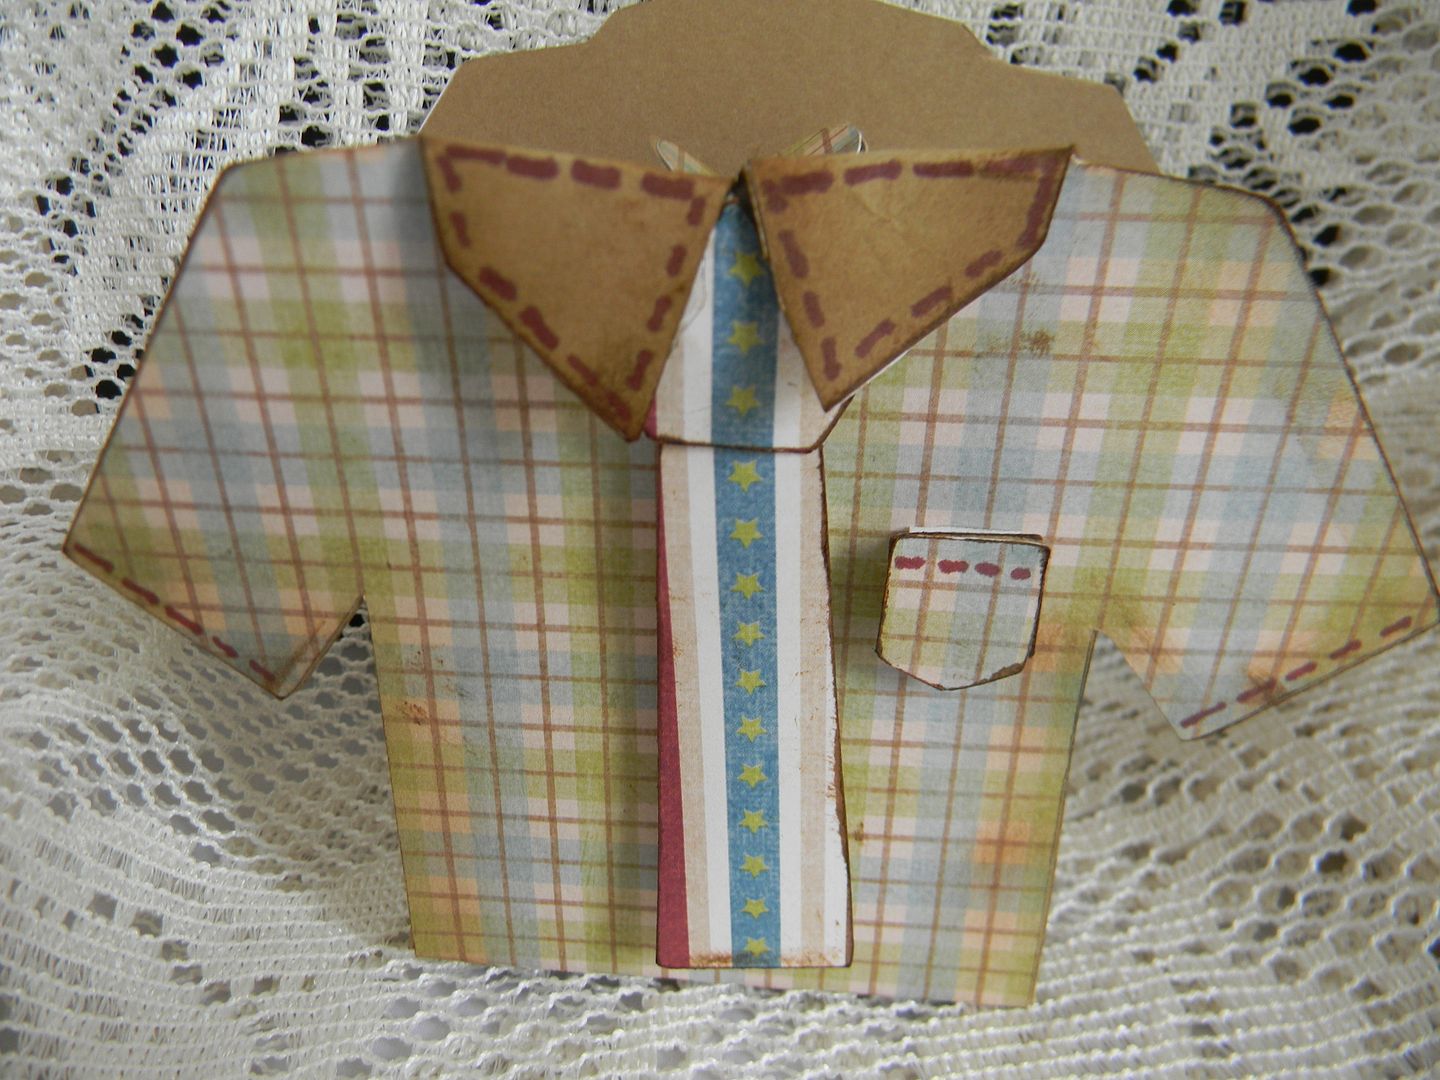
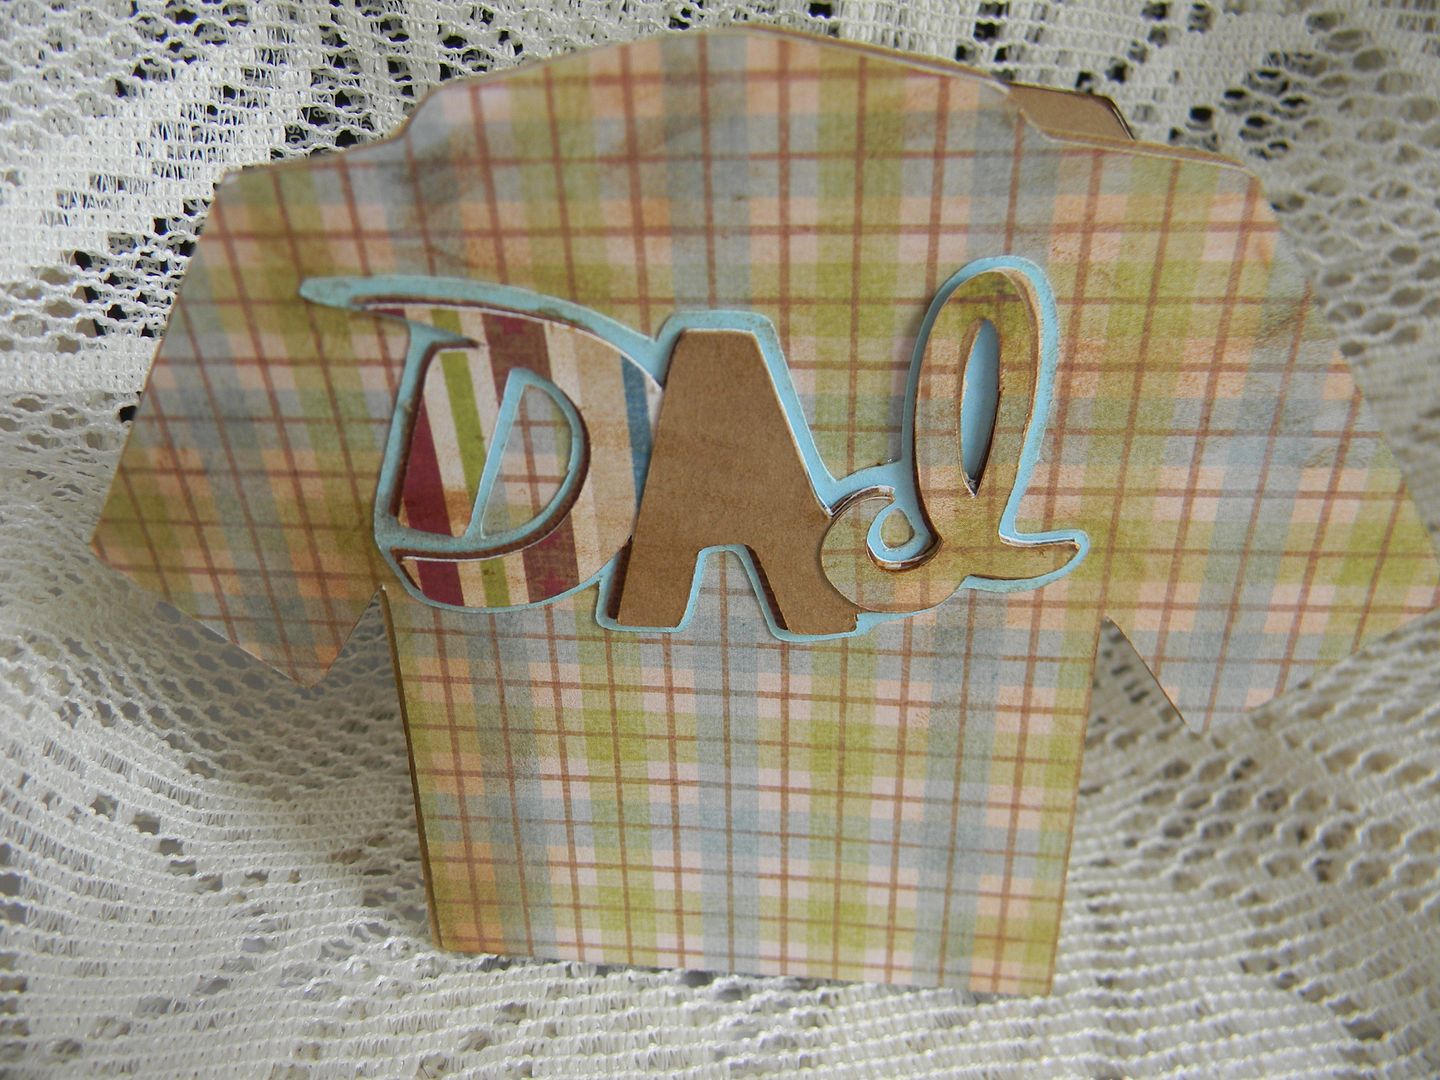
It's  Wednesday so time for a wonderful challenge from Cooking with Cricut.  This week in honor of Father's Day the challenge is to make a Father's Day Gift- no card.  For this challenge I cut the shirt box from Tags, Bags, Boxes and More using DCWV Guy Stack paper and Kraft stock.  
Such a cute little box to fill with some sweet goodies or a gift card.  

Dad was cut from Out of Character at 1 1/2 inches for the back of the shirt.
I did make a matching card to go with it and even used my sewing machine.  
So don't forget to create a Father's Day gift and join us at the CWC challenge this week.  You have one week to share your creations.  
Also linking to the Die Cuttin Divas
Father's Day Challenge 
and the Celebrate the  Occasion - Father's Day Challenge 

Sunday, May 20, 2012

Sweet Sassy Diva Design Team Project= Graduation

Today is another busy day here at Cricut craftin grammy. 
First I will have a post for Whitney's Sweet 16 Blog Hop.Click here for my post   
Second will be my Graduation DT post for Sweet Sassy Diva Click here for my post 
and last but not least will be my Lasting Memories "Celebrating Mom's" DT post. Cllick here for my post 
I hope you will check in at all these posts.  


This week at Sweet Sassy Diva its all about "Graduation".  In a way its also a graduation for me as I complete a year as part of the Sweet Sassy Diva Design Team.  One year ago Bobbi Jo gave me the opportunity to be on my first Design Team and I have learned so much and had a great time this past year.  However,  I have decided to step down at this time to design on other teams.  Thank you Bobbi Jo and all my design team buddies for inspiring me this past year.   I hope you will continue to follow me and keep in touch on my blog cricutcraftingrammyblogspot.com. 
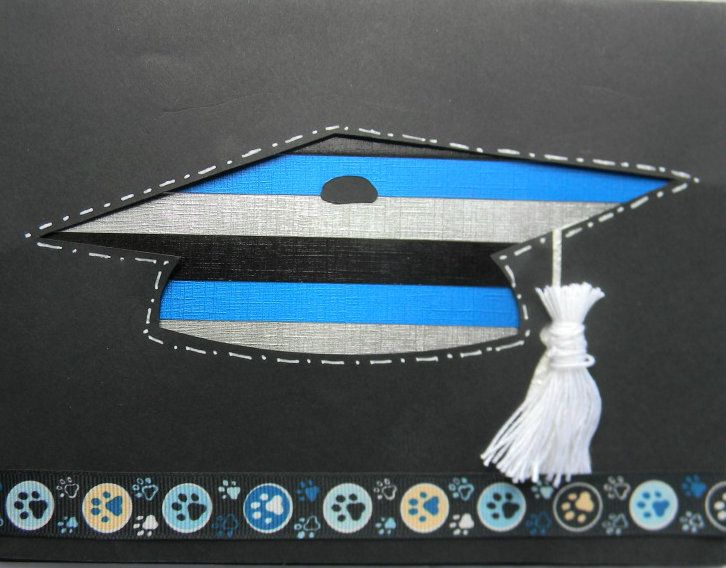
So for my graduation project I made a neighbor for a family friend that is graduating from High School in June.  Since my girls and I all went to the same school I decided to use the school colors.  The mascot of the school is a Bulldog so I selected this great ribbon I had in my stash.  
Here is the front of the card.
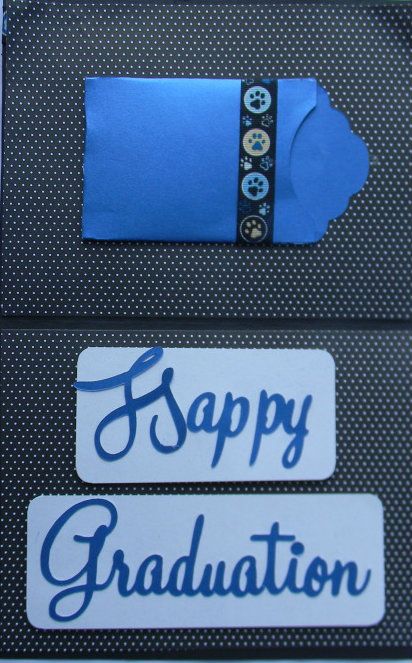
Here is the inside.  I covered over the top and bottom 1/2 with dotted black and white paper.  This covers the pieces you taped in place.  
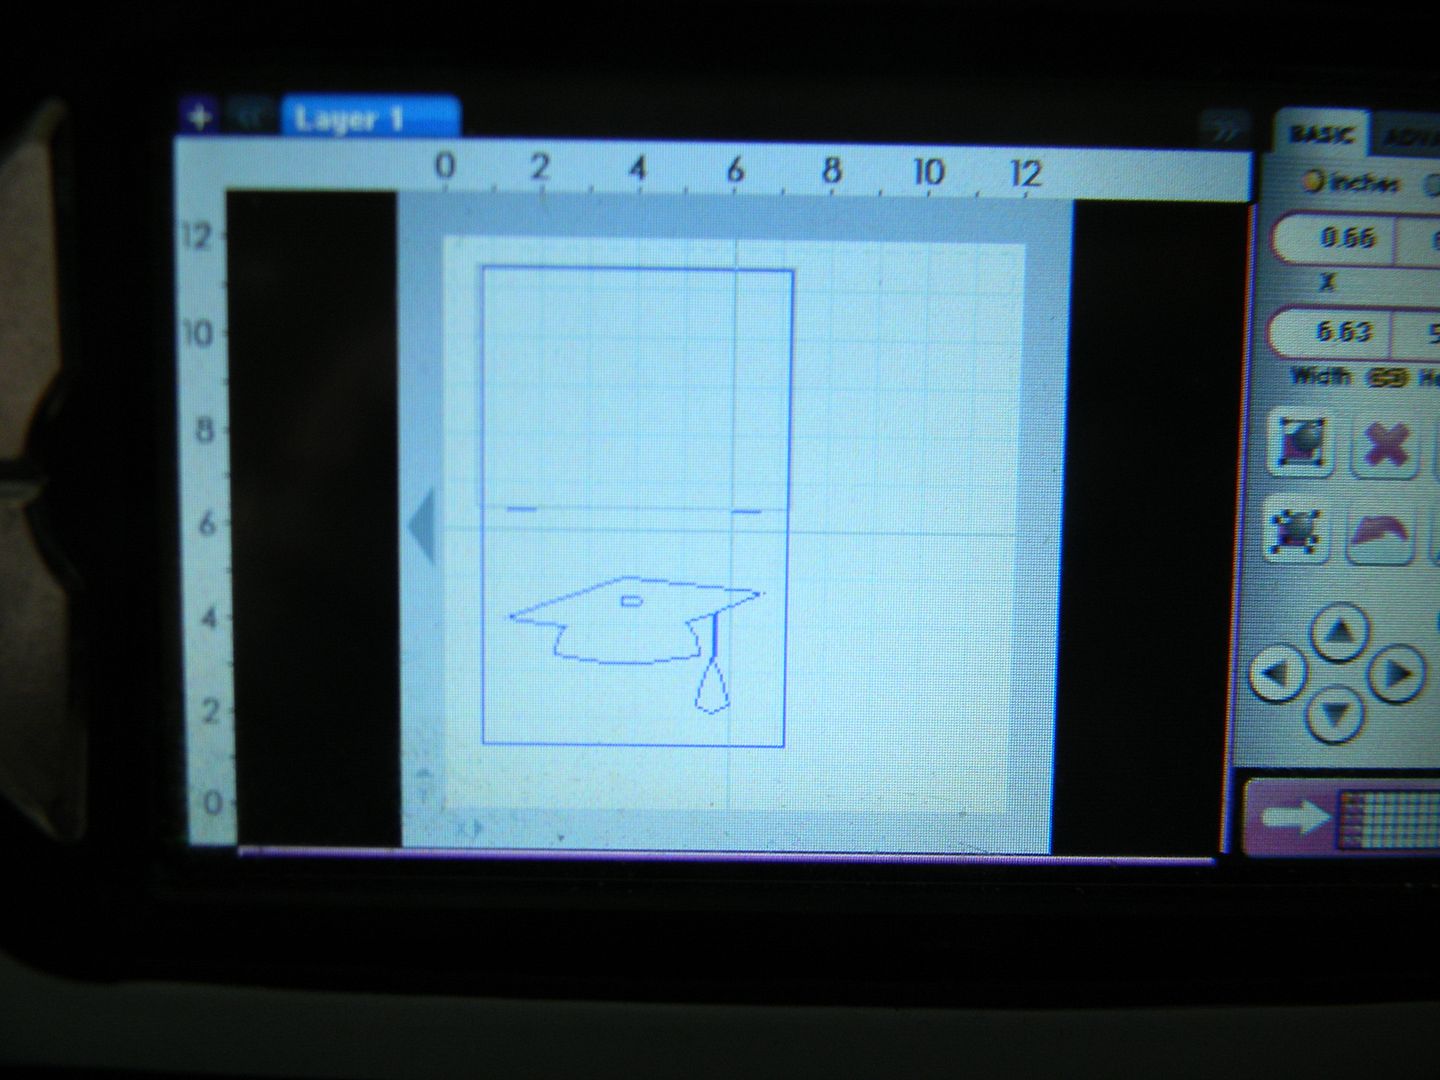
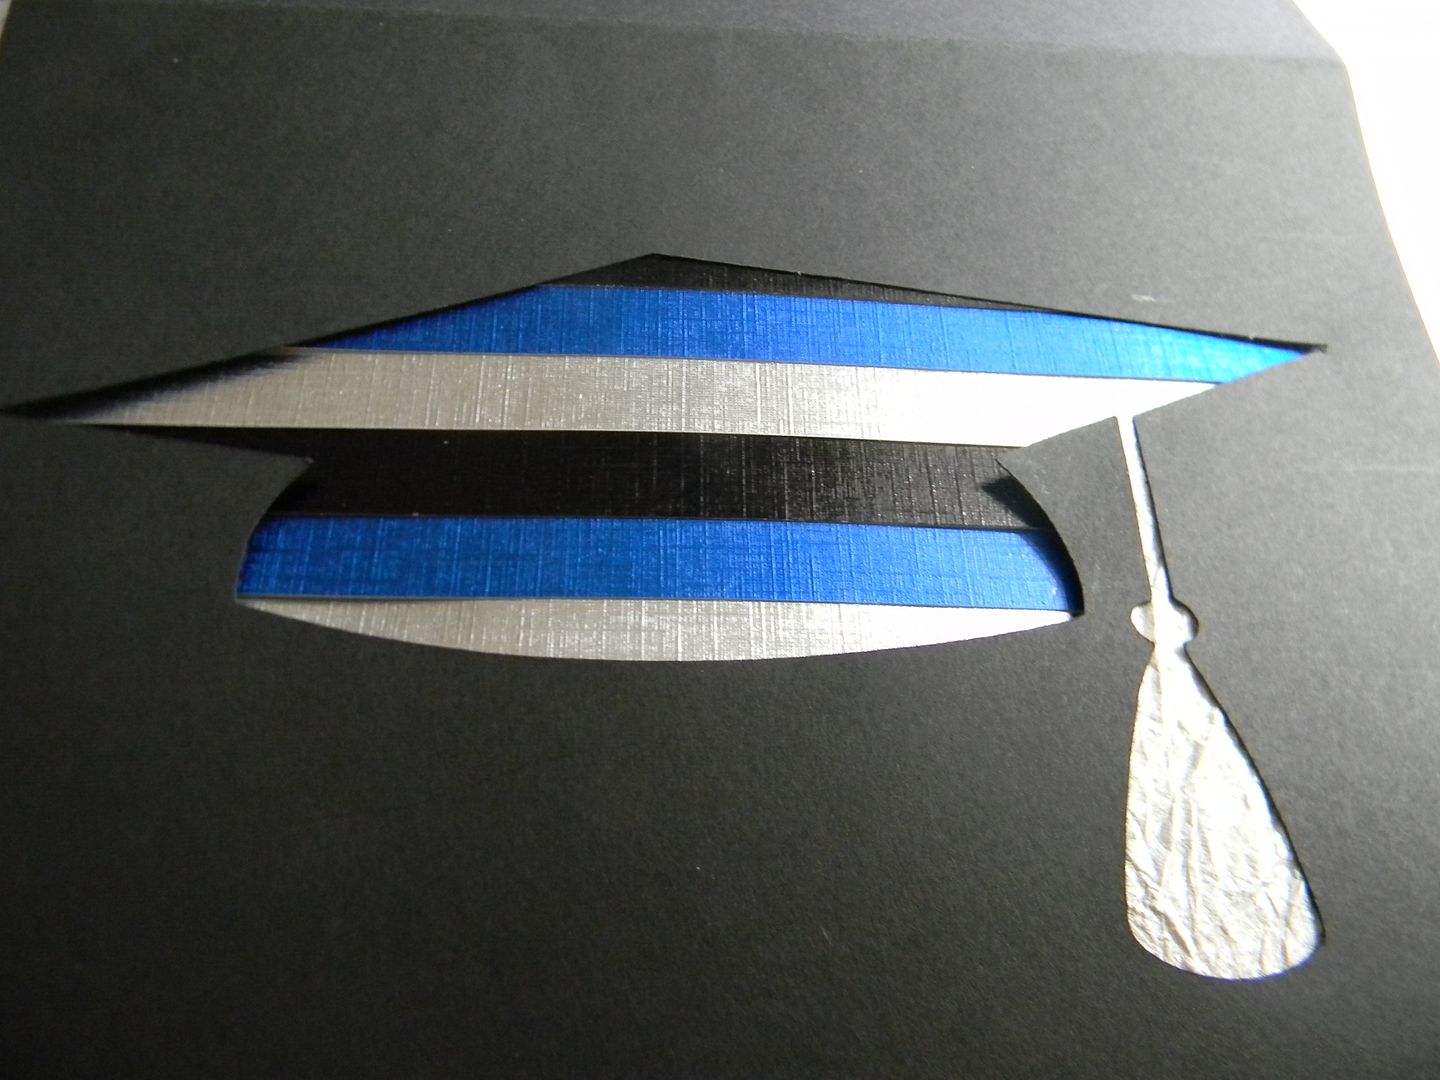
The graduation cap is the card cut from Wrap it Up page 67 cut at 5.75 width.  
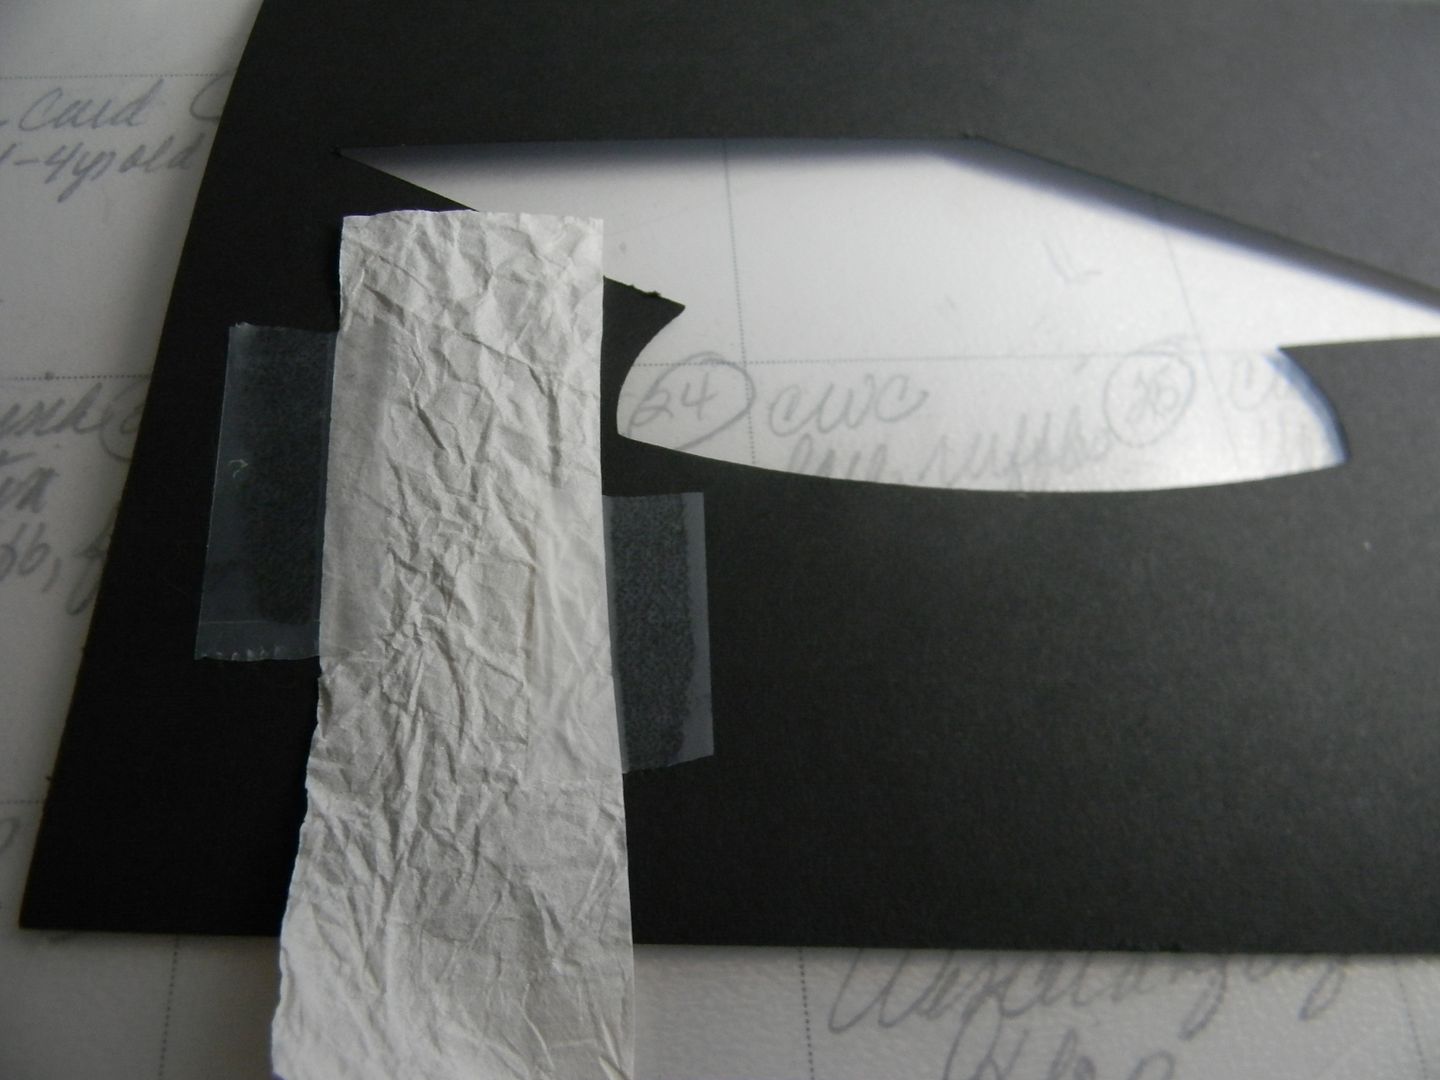
I covered the tassel with some white crinkly paper on the back side of the card.
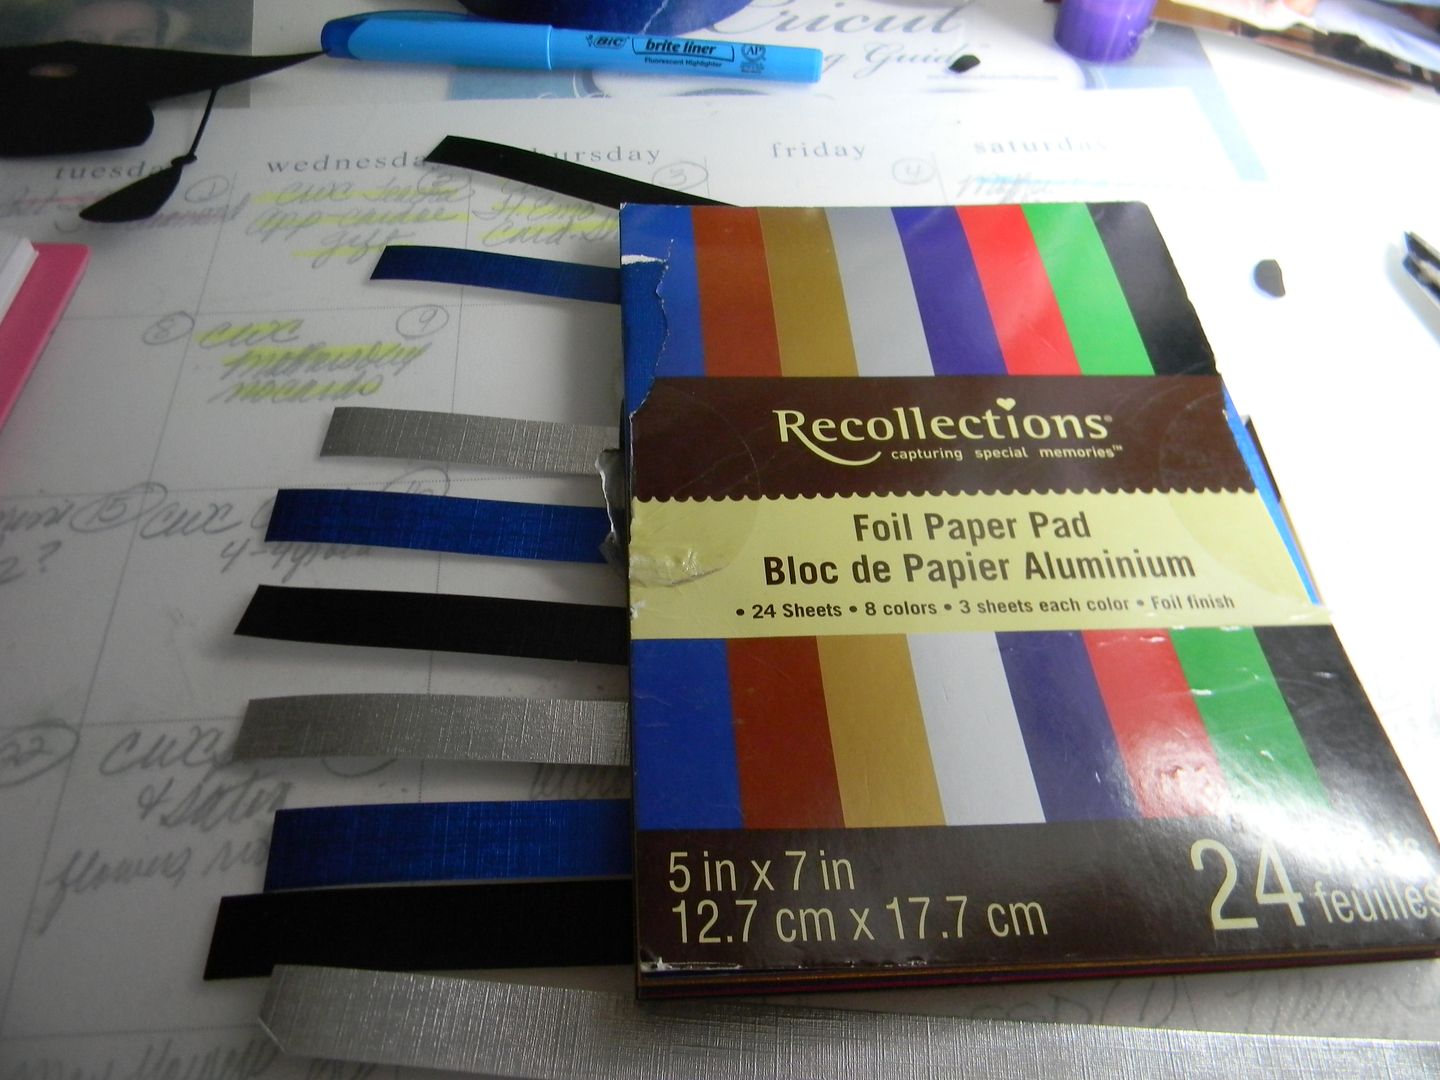
I then cut out 1/2 inch strips of this foil paper from Recollections.  
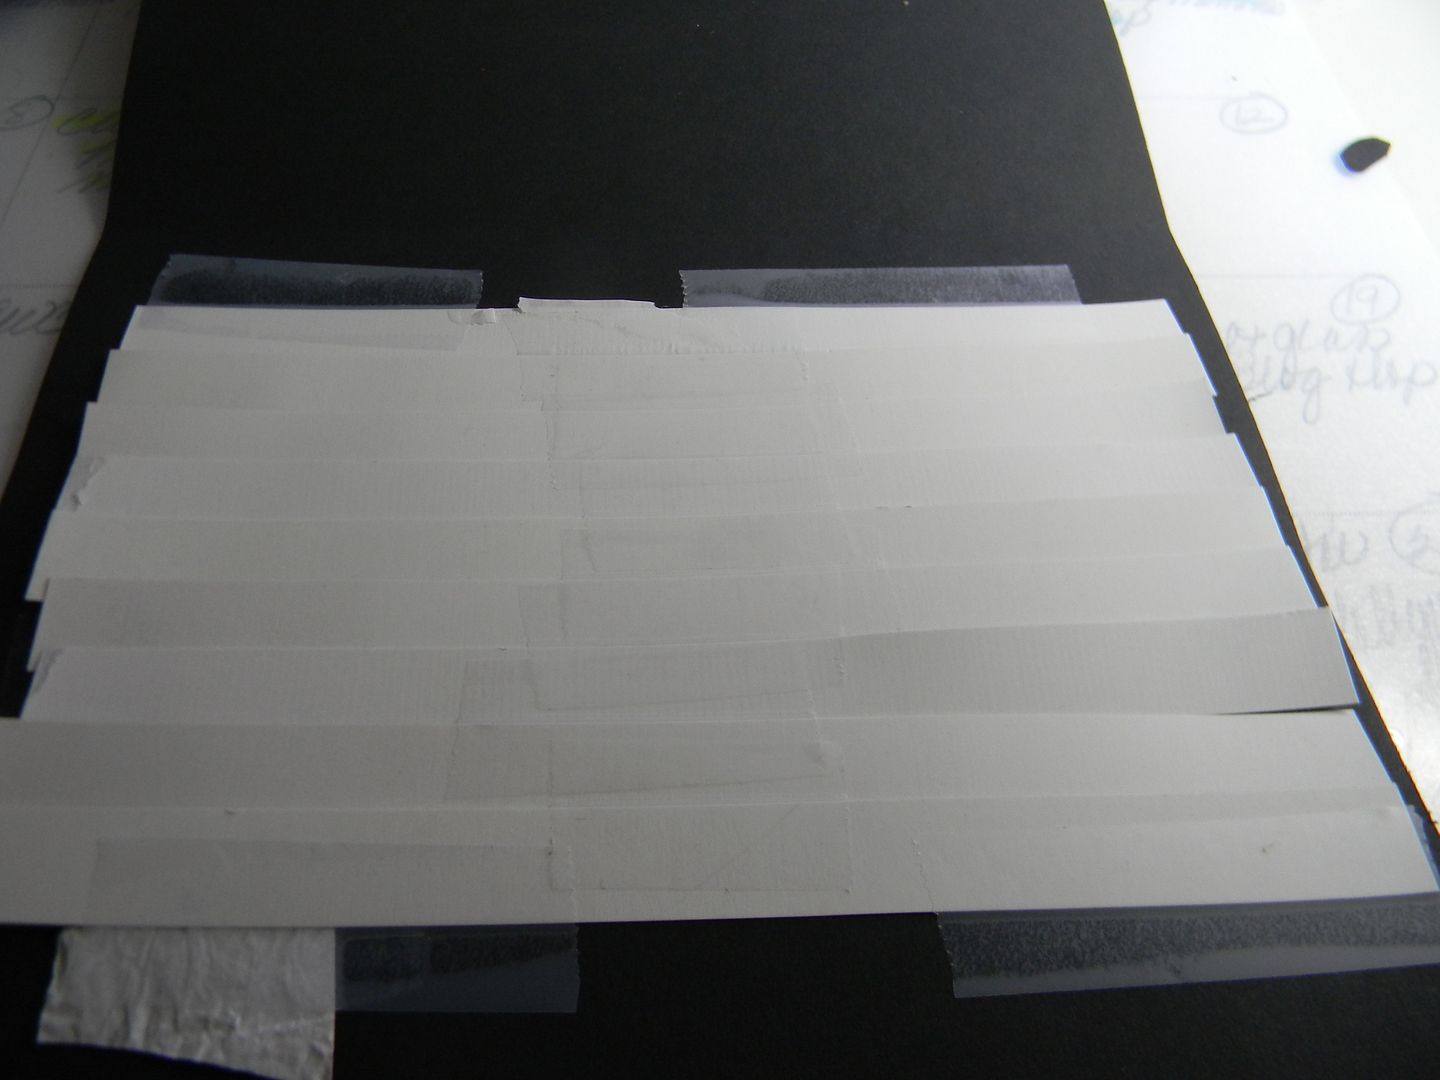
I taped the strips together 9 in total and then adjusted until I liked how it looked and taped it down over the cutout of the cap.  
Here is how it came out.  
Next I doodled around the edge of the card and added the center button piece.  
I then made a tassel out of white crochet thread ti give the card more dimension.   
For the inside the Happy Graduation was cut at 1.5 inches from MS Seasonal Cart.  
The pocket for the gift card was cut from Tags, Bags, and More page 112 at 9 inches. 
Thanks for stopping by and please come back and check out what the other designers have in store for "Graduation." 

Also entering this in the My Craft Spot- Congratulations challenge
Happy Craftin.