

I am so excited that Melin and the Design Team at My Paper Crafting are starting a new post for Thursdays Totally Tags n' ATC's. Starting today February 21 Thursdays will be the day to explore different themes, elements, techniques or embellishments. This week we are using ribbon on our tags and ATC's. There is no restriction on what tools are used to create these tags or ATC's. It could be a die cut machine, punches, stamps, etc. The sky is the limit. However if the Design Team uses Digis or SVG's they will be from Paper Crafting World.
As a side note, if you don't know what an ATC card is, here is an
interesting definition from Wikepedia.
Artist trading cards (or ATCs) are miniature works of art about the same size as modern trading cards baseball cards, or 21⁄2 by 31⁄2 inches (63 mm × 89 mm),[small enough to fit inside standard card-collector pockets, sleeves or sheets.[The ATC movement developed out of the mail art movement and has its origins in Switzerland. Cards are produced in various media, including dry media (pencils, pens, markers, etc.), wet media (watercolor, acrylic paints, etc.), paper media (in the form of collage, papercuts, found objects, etc.) or even metals or cloth. The cards are usually traded or exchanged.
I will be coordinating the post for Thursday and can hardly wait to see what all the awesome Design Team members create. I for one have not always been a big tag maker but have recently started exploring tags as a new way to express creativity, try new techniques and use my scraps.
I hope you will join us each Thursday here at My Paper Crafting for
Totally Tags n' ATC's.
So here is my project and please check out the other DT projects.


Paper- A Lady's Diary Graphic 45
Tim Holtz filmstrip
Misc, Bottle cap and stickers
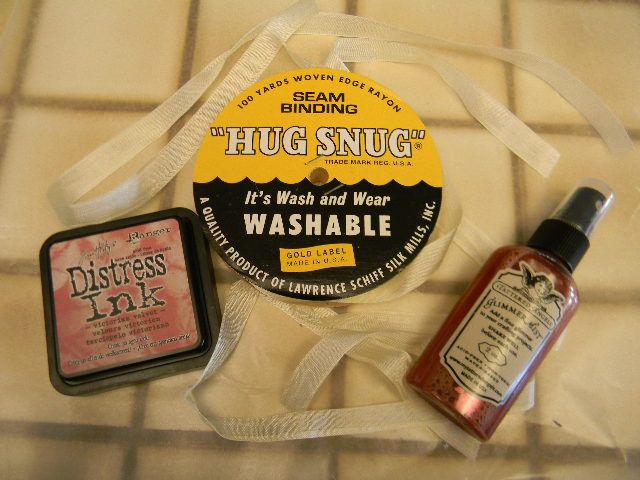
Hug Snug Seam Binding (Amazon 100 yards less than $10) and Rosette
Tattered Angel Glimmer Mist- Creme de Rouge and Vintage Pink
Tim Holtz Distress Ink -Vintage Velvet
Tutorial for Dying Seam Binding
I use the Hug Snug Seam Binding that can be bought on Amazon and other sites (link above)
You can use Glimmer Mist or Inks to color the ribbon.
Place a mat or wax paper on your work surface.
For Glimmer Mist spray color on to mat and soak cut pieces of ribbon with spray until saturated.
You can add more spray if you need it.
I highly recommend plastic gloves to keep your hands clean.
To use Distress ink rub the ink until ribbon is covered.
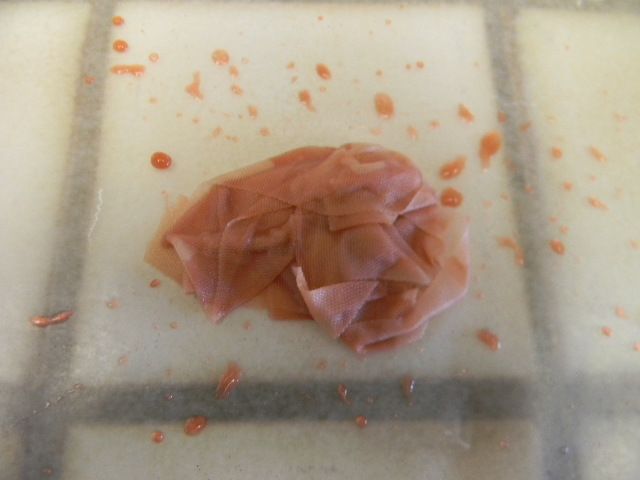
Crumple up the ribbon and allow to dry to keep crimped look. If you need it right away you can dry with hair dryer or heat embosser but it will not be as crinkled.
Here are the ribbons I did top is cream ribbon no ink.
The next one was done with Distress ink. which is darker.
The other two are Glimmer Mist spray.
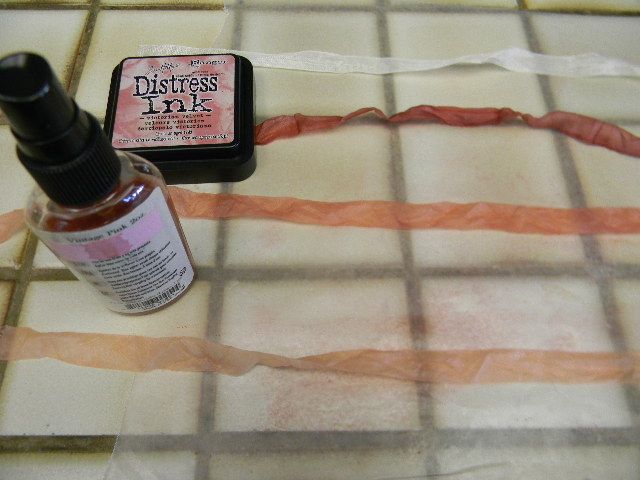
For my actual ribbon on my project I used the lighter color sprayed ribbon and then inked some with Distress Ink-hence the dark and light hues. The rose was cut from a yard I bought of the roses and lightly sprayed with Vintage Pink Glimmer Mist.
It is really fun to experiment and since you get 100 yards for less than $10 it is cheap.
You can also use Alcohol Inks.
WOW Thank you so much for this great tutorial and for sharing this amazing tag! I will have to see about getting some of that seam binding sometime. What a great way to make your own custom crinkled ribbon!!! Thanks again my super crafty friend!!!
ReplyDelete-Melin
Beautiful tag, great tutorial.
ReplyDeleteLove this vintage-feel tag, Suzanne! Just gorgeous!
ReplyDeleteSuzanne, this tag is just lovely. Your seam binding turned out so well mine is hopeless. Very pretty.
ReplyDeleteSue
Suzanne, gorgeous tag! Wonderful tutorial as well! :)
ReplyDeleteStunning! the papers, the techniques - it's a true work of art. Congrats on the newest challenge at MPC. I know you'll have a fabulous time.
ReplyDeleteHugs,
Larelyn
This is just fantastic! I love it!
ReplyDeleteHugs,
Chriss
Love the vintage tag, Suzanne. Thanks for the tutorial!
ReplyDeleteYour tag is amazing my friend! I love all the layers and cool things you have going on this tag! Of course I love the vintage feel and I am going to have to get me some of those bottle caps now! lol Hugs!
ReplyDelete