Just Kitting Studio Items for Sale

Sunday, July 10, 2011

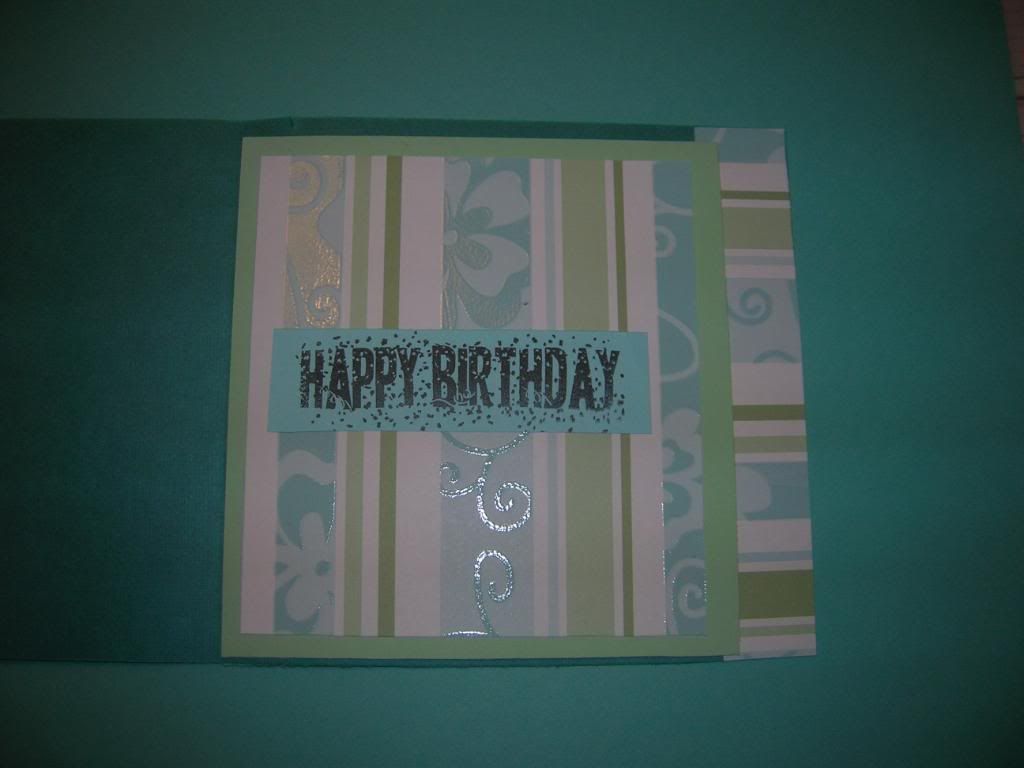
Hawaiian shirt birthday card for hubby

This is the card I made for the Cricut Cardz Challenge which is to make something with summer apparel or accessories.  I chose the Hawaiian shirt from Pack Your Bags to make a card for my hubs birthday.   My husband loves to wear Hawaiian shirts so I chose some paper that is similar to the colors he likes.  I used a  MS punch with shells and sand dollars  on the side and corners.  I chalked the edges and added little buttons.  

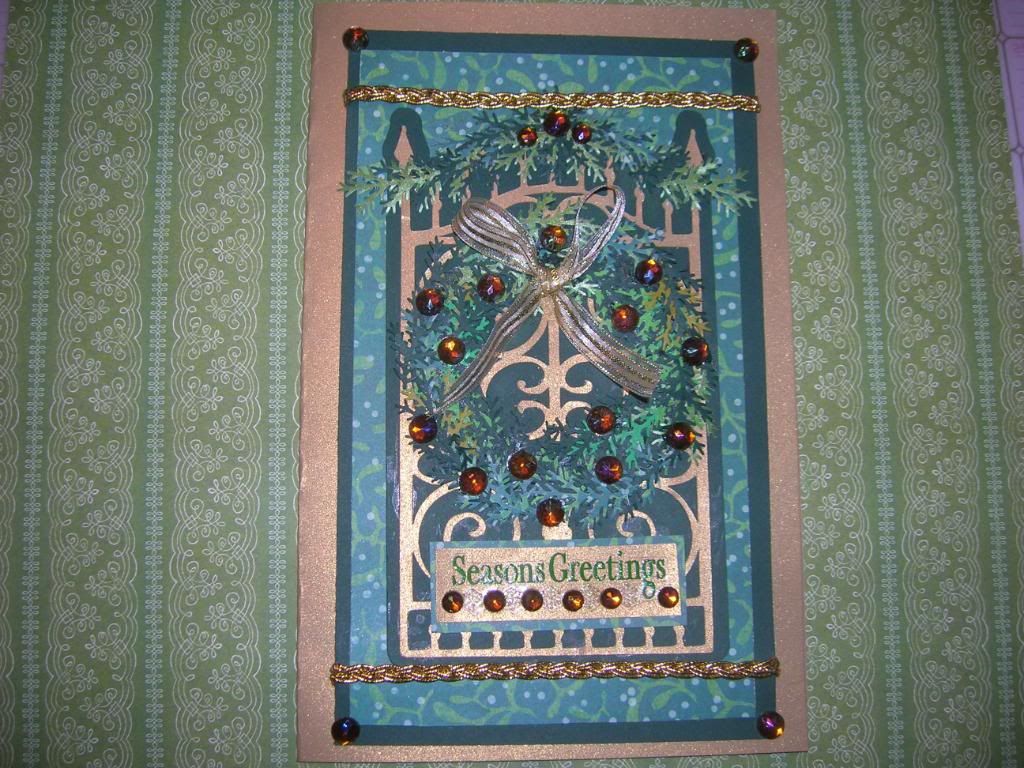
Christmas card using Ornamental Iron and MS branch punch

Here is a card I made today for two Christmas Challenges.  I used Ornamental Iron for the gate cut in gold paper with the shadow cut in dark green.  I used gold braiding and some amber bling and gold ribbon.  The wreath and garland are made from the MS branch punch and punched in 5 different colors of green to give it texture.  
Celebrate the Occasion -Christmas in July no red
The Paper Variety - Christmas Theme 

Welcome to the Circus Tour- Circus Mini book

Starring 7 of your creative crafty clowns from the Sweet Sassy Diva Design Team- Jennifer, Martha, Kim, Tina, Misty,  Jennifer and Suzanne.  (Also pictured our talented leader Bobbi Jo.)

For the challenge this week Bobbi Jo asked us to Mix It Up.  The 14 Designers for Sweet Sassy Diva divided up into two teams.  Our group decided on the them "Circus".  We all though this would be a lot of fun for the designers and the blog followers alike.  

Before I begin with my project I would like to give you a little history of the circus.  The Circus which has it origins in Rome with the Circus Maximus began as an open air competition.  This was the first event that women and men could participate together in a public place.  The first circus in the USA was in Philadelphia in 1792 and the first use of a circus tent was 1825.  When Barnum and Coup started the animal and human oddities sideshows the circus began using trains to travel, three rings for performers and the circus became more of what we know today.  

So on with the show!

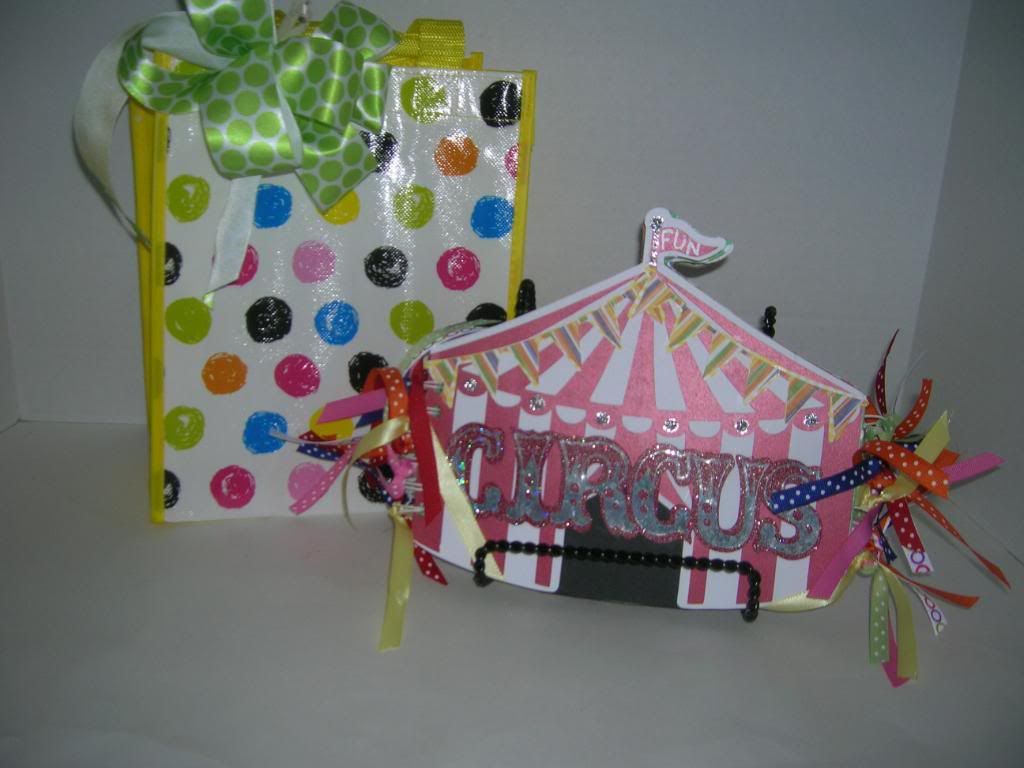
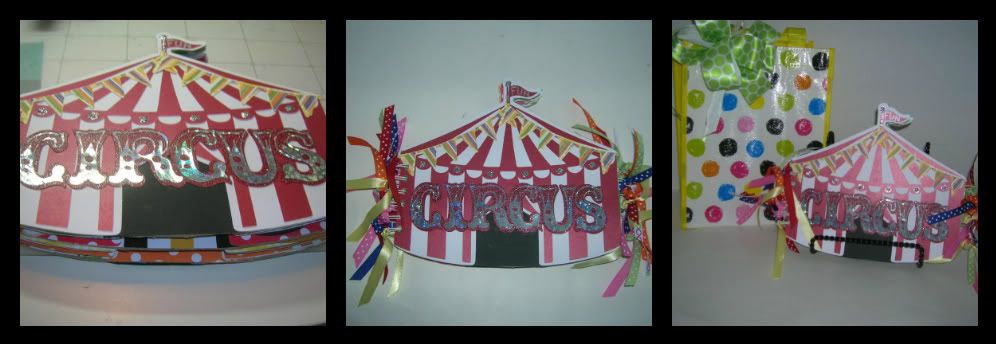
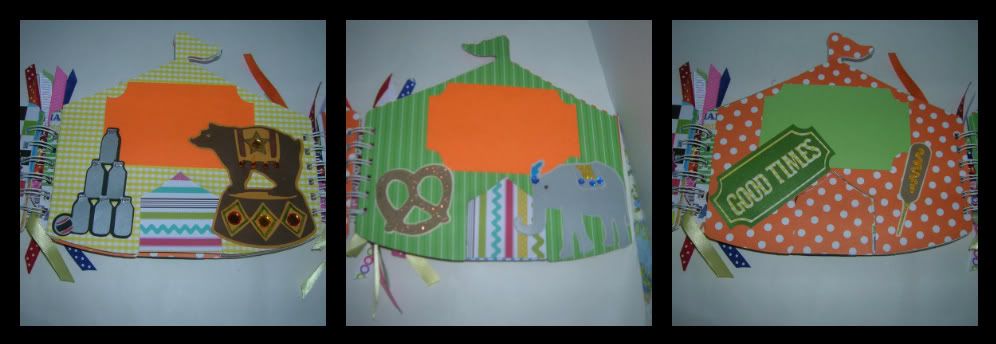
Greetings today from Suzanne at cricutcraftingrammy. I had so much fun making this Circus mini book for the challenge.  First is a picture of my completed book and the bag I found at Michaels in the $1 section to put it in.  We are going to the Ringling Brothers Barnum and Bailey Circus this summer with our dear family friends so I am gifting this to them to put their pictures in.  

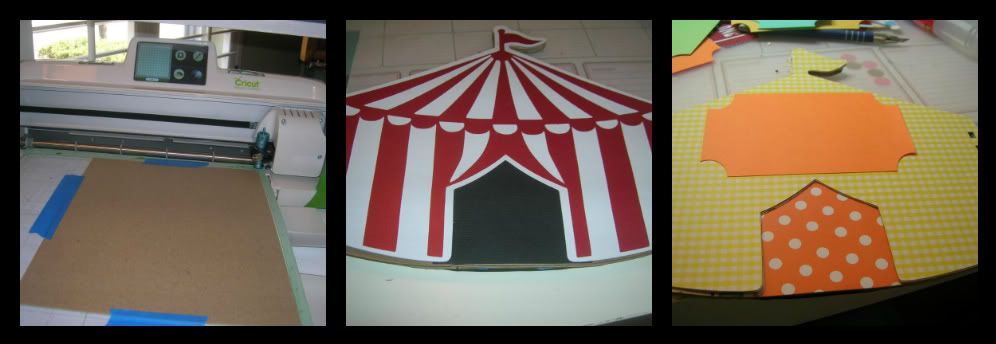
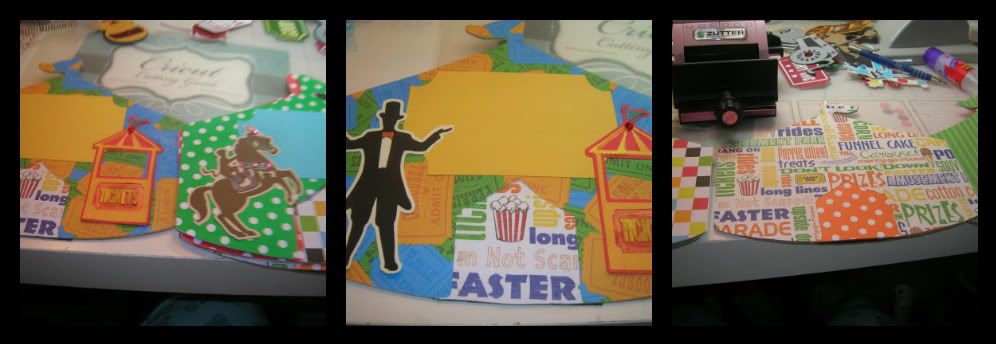
This is the first time I have made a chipboard die cut shape book with my Cricut.  I designed the tent on my Gypsy at 7.5 x 9.  Got out my deep cut blade for the first time and multi cut the shadow 5 times.  As you can see in the first picture I used painter's tape to secure chipboard to my mat.   I then trimmed  or sanded the rough edges with an emery board.   For this book I made three chipboard pages.  I then cutout  6 shadows cuts at the same size using  craft paper from Michael's.  
Next I cut 2 of the shadow in white and two of the detail tent in red.  I glued a piece of black paper in tent door holes before gluing together.  I use my ATG gun and Beacons 3 in one Glue.  Make sure all corners are glued well.   Then I began cutting  the same shadow cut for all my pages.  I used striped, dots and other cheerful paper.   Right now you can get a great polka dot pack of Recollections paper at Michaels. Cut 6 with flag pointing to right and then flip design on Gypsy or your machine so the next 6 are cut with flag pointing to left.   I left all the doors open except on three chipboard pieces.  The front and back black and then the one in the middle a scrap of decorator paper.  I then cut the ticket shadow for my picture mats.  
Remember you can click on the pictures to make them bigger at anytime.  
Next I cut out a large variety of cuts.   They are pretty quick to cut out as there are only two cuts per item. However some of the cuts are very difficult to get off the mat and glue under 4 inches.  So be careful of thin pieces.  I then decorated my pieces with Smooch Ink, Stickles and gems. 
DO NOT GLUE PIECES IN UNTIL YOU HAVE BOUND BOOK!!!!! 
 Some of my pictures were blurry so I had to substitute for directions.  
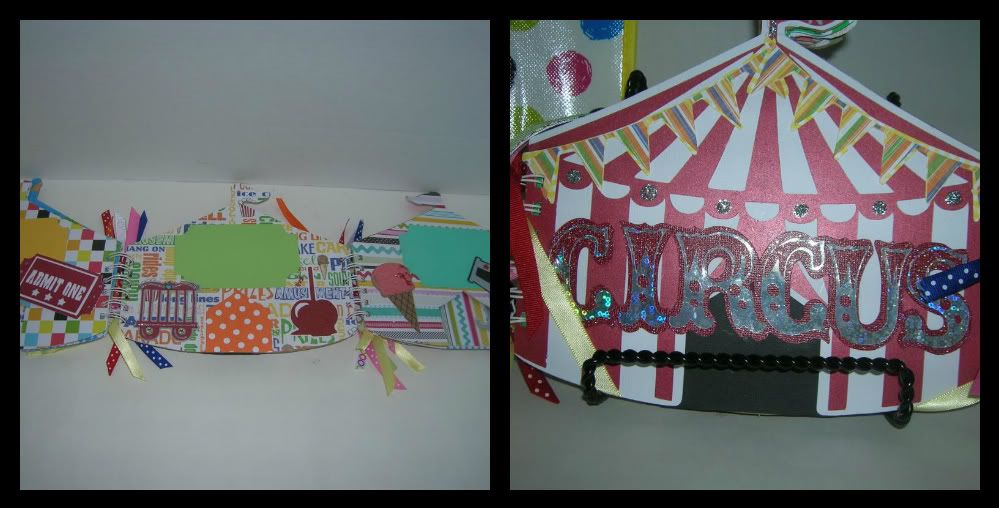
 Next I laid out my pages.  This book when completely open is 3 across.  So on the left is the cover face down and three pages flags all pointed to left, then the back cover  back down flag pointing to right , and then the middle chipboard to the right and lay the other 3 pages on top flag facing to right.  
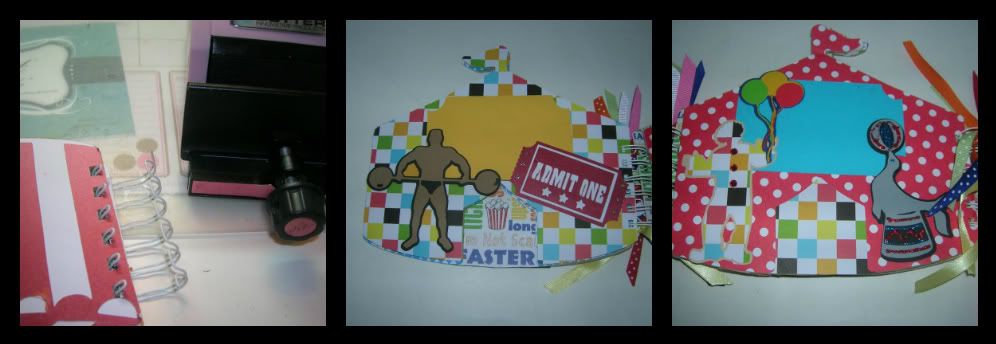
I then trim a 1/2 inch off the far right side of the right side chipboard and pages so they will lay flat after binding.  Follow directions and bind cover and three pages to the left side of the back  not catching the right pages.   Then bind the right chipboard piece and pages to right side of back cover.  
After binding I had ribbon cut at 8 inches to decorate.  If you do not have a binding machine you can punch holes and use office rings.  Many office stores have these in beautiful bright colors now.  Now the fun begins and you can decorate your pages and cover.  I cut all pieces from Carousel.  cut sizes are at the bottom of the post.  

I used prism paper for the Circus title from Target.  I did not plan to make the title this big but again the letters have very thin lines and I made them larger to keep the cuts correct.  
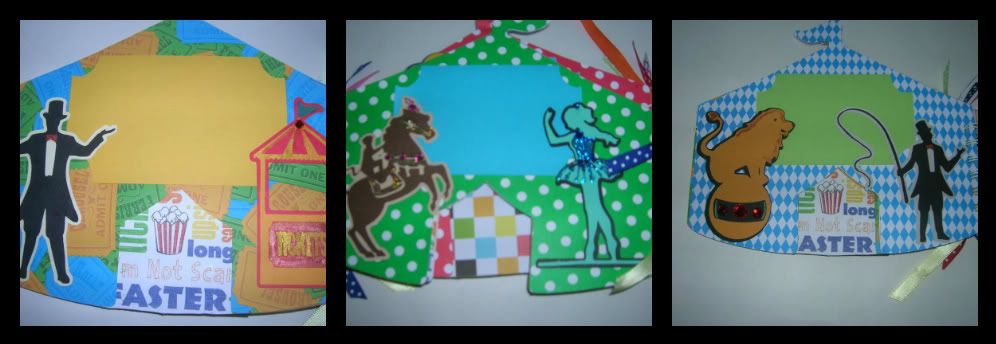
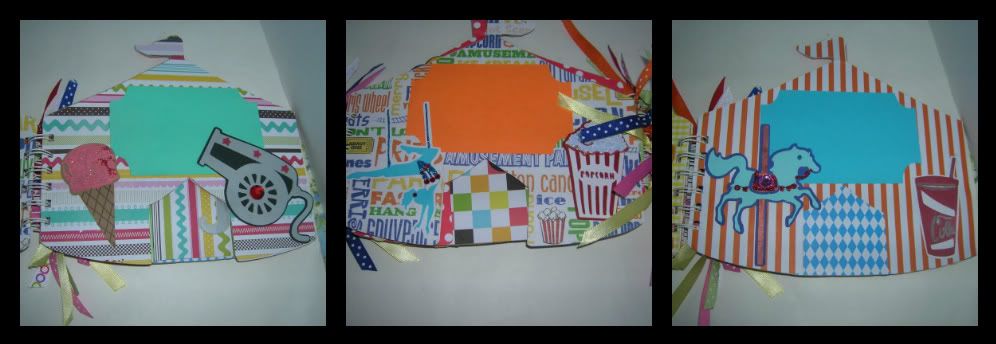
Here are 12 individual pages including two you saw earlier and the back center page.  If you want more you can add more pages.  
Cut Sizes
4 inch cuts- ringmaster,  ticket for pic layout , horse with monkey, tightrope, lion, lion tamer, trapeze, strong man, clown, seal, bear, corn dog
3.5 bottles
3 inch popcorn, canon, soda, elephant. candy apple, balloons
2.5 train car
2.0 flags, pretzel, good times and admit ticket
1.5 Circus title 

Hope you enjoyed the Circus and the mini tutorial.  If you have any questions please ask and come back this next week for more "Circus Fun."
Also entered in Cricut Cardz Challenge

Saturday, July 9, 2011

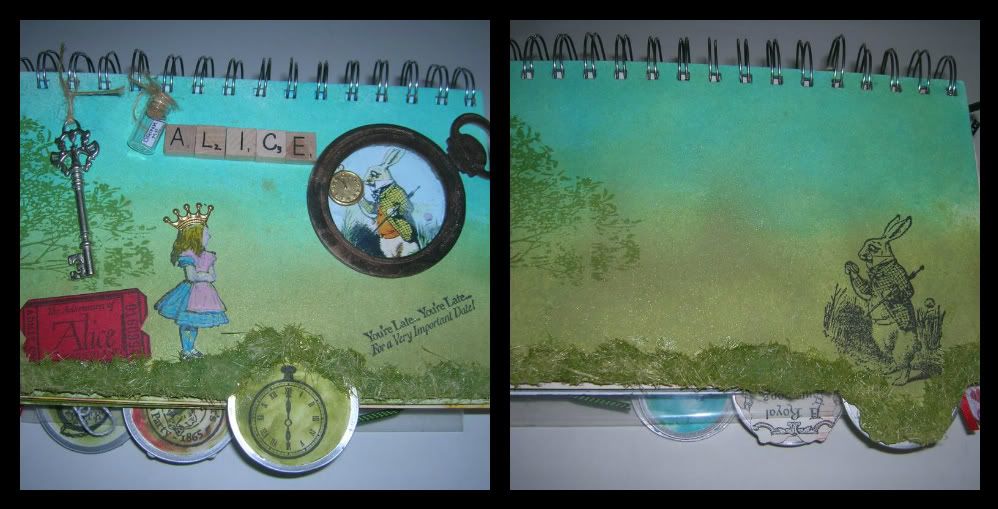
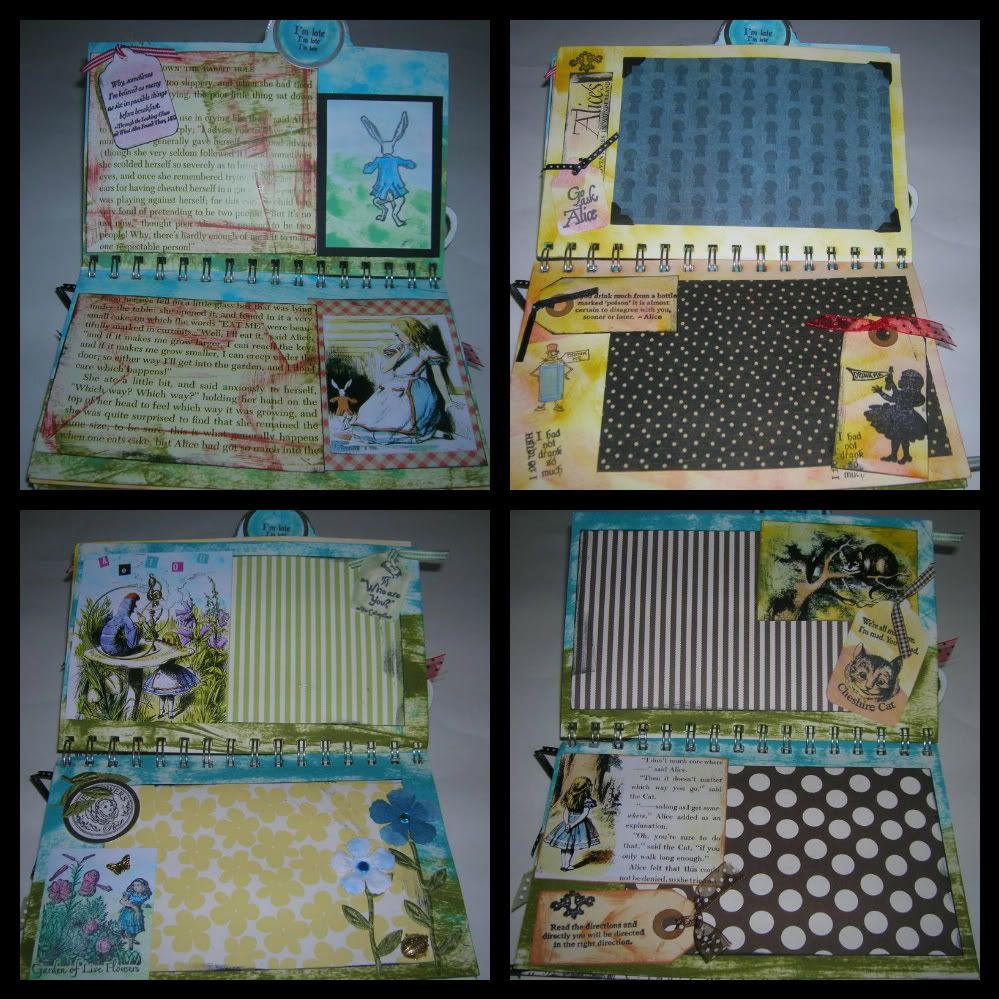
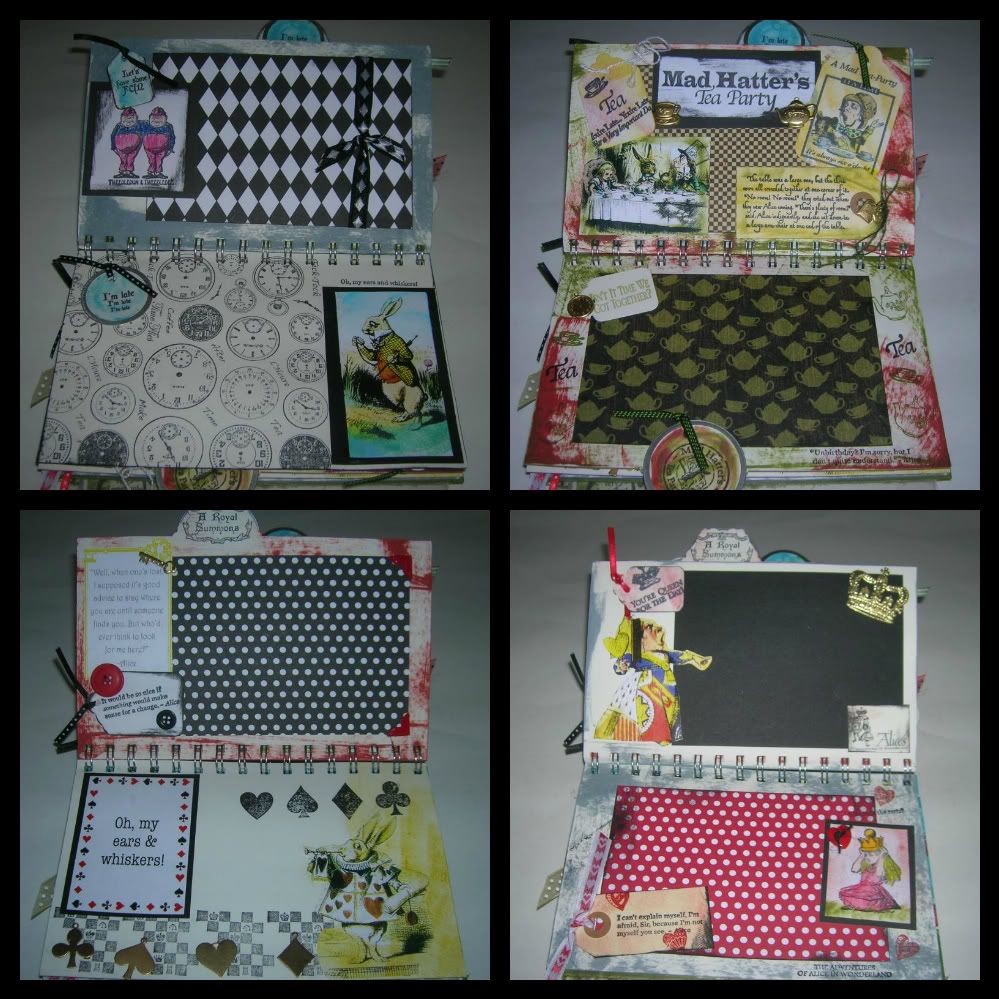
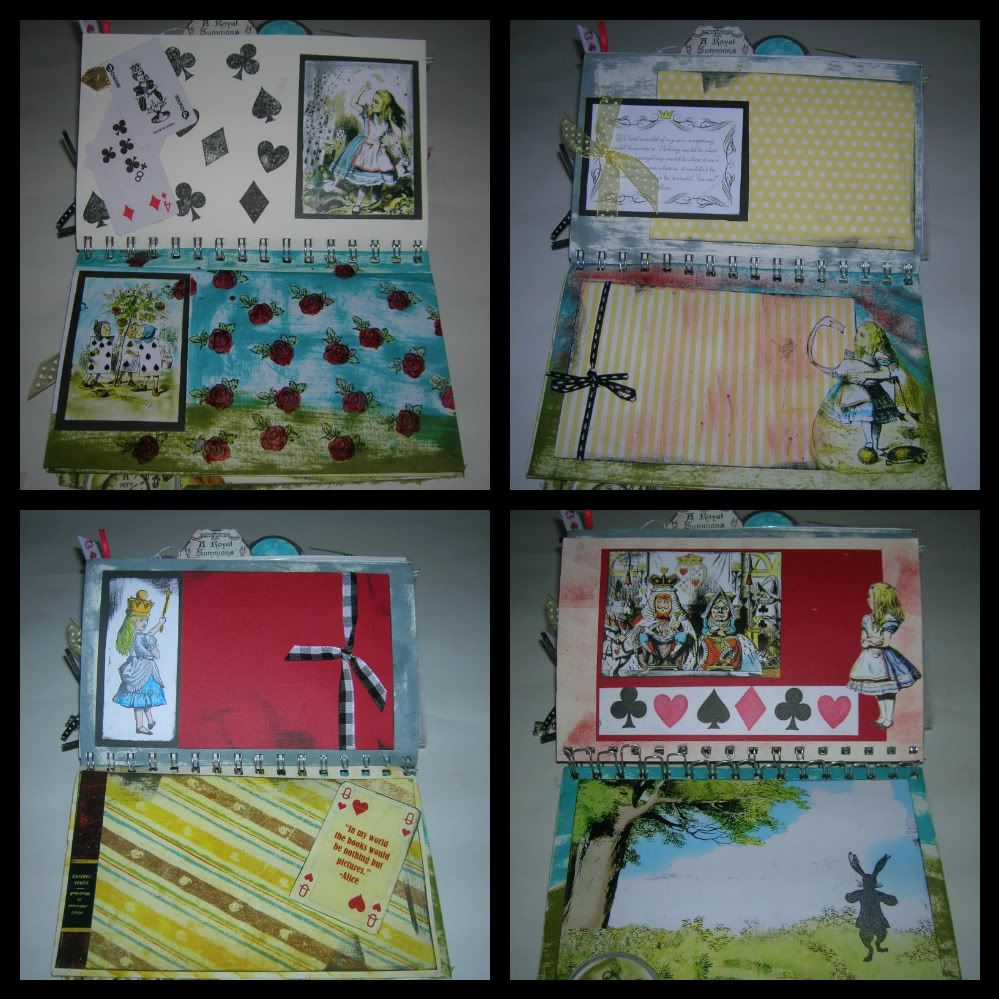
Alice in Wonderland Book class I took at LSS today

I had a great time today taking a class at my local LSS.  The teacher was amazing and so organized.  There were 5 of us in the class and we had a blast.  Made the entire 26 pages including the front and back today.    I am so tired but so glad I took this class. Mos of the product is Graphic 45.  The book was a snowflake book from Tattered Angels.  Isn't this book just too cute!

Friday, July 8, 2011

Three cards done for challenges

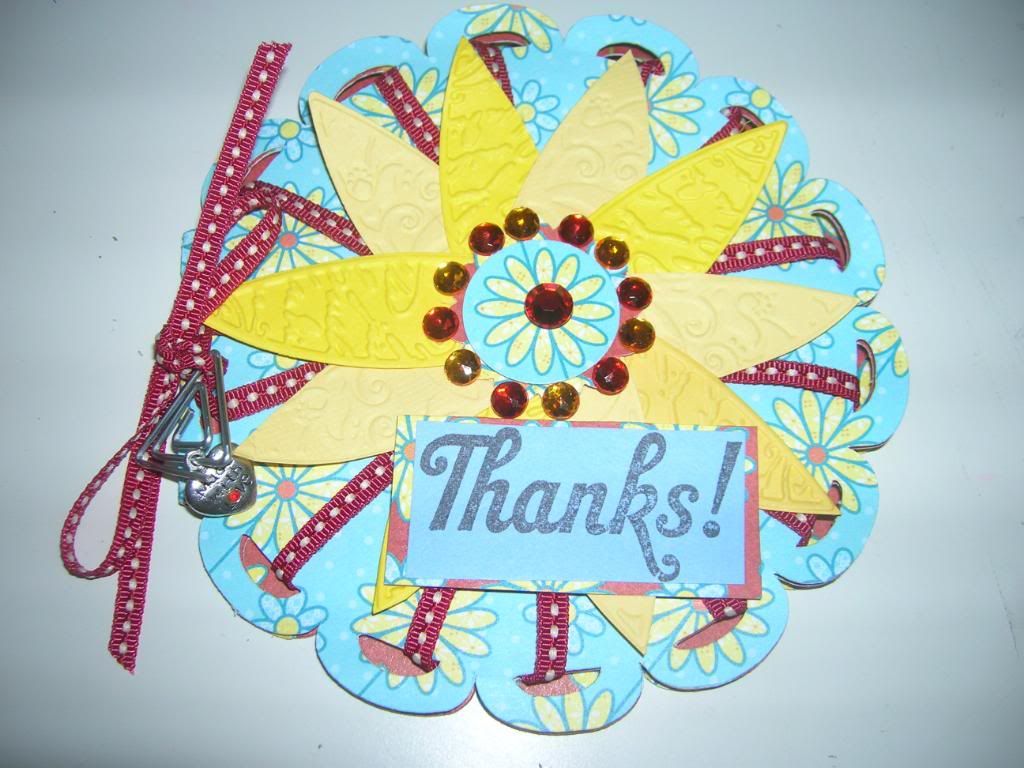
Today I finished the 3 cards I was working on for a variety of challenges.  I used Wild Card and a Cuttlebug flower folder that cuts and embosses the individual petals.  I weaved through the holes in the flowers  and then covered inside with same cut.  I then tied a bow, stamped Thanks, and added rhinestones and a charm with a triangular paper clip I got at office supply store.  

Circle 360 challenge  Make a thank you card in a circle shape.

Die Cut Divas Follow the sketch 
Frosted Designs Recipe using ribbon or trim, rhinestones or pearls, and a charm 
My Creative Time  Use wild card and embossing

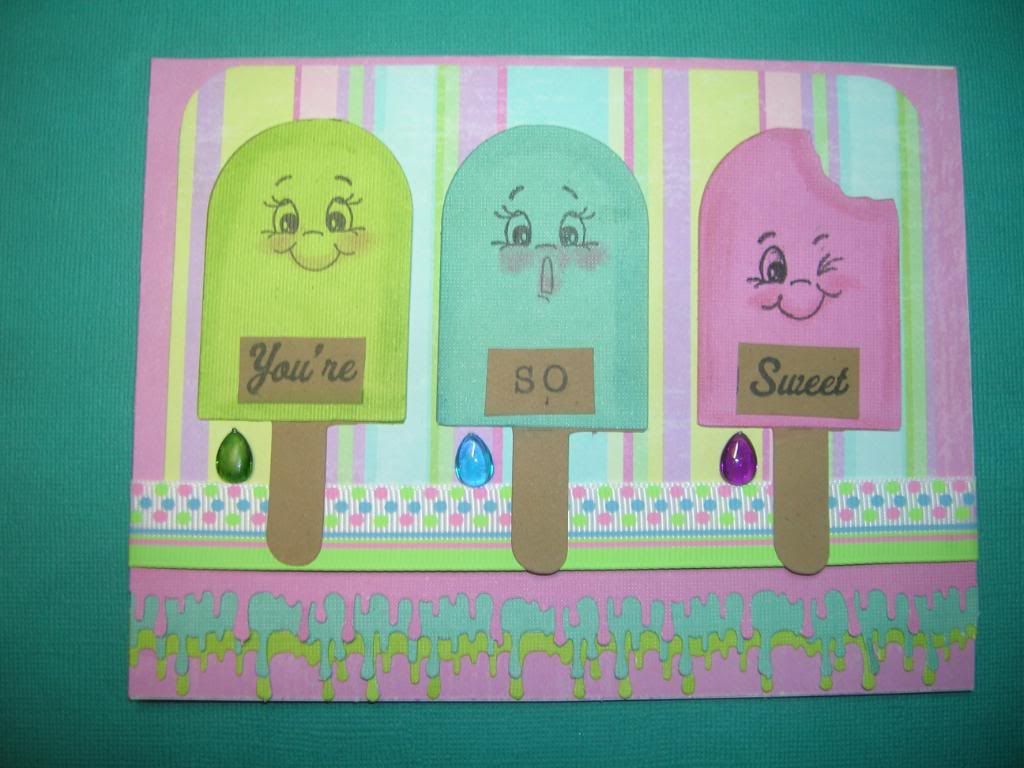
For this card I cut three popsicles from Simply Charmed and added Peachy Keen faces.  I used chalk on cheeks, mouth and edges. The little drips are little teardrop stones.  I did not have green so died a clear one with Alcohol Inks.  The stamp was one that said You're Sweet with a cupcake in the middle of the two words so I cut cupcake out and used some mini stamps to stamp so.  I also used the MS drippy goo punch for the dripping popscicle. 
Peachy Keen Use patterns and Peachy keen faces
Tacky Tuesday  Cool treat with word sweet
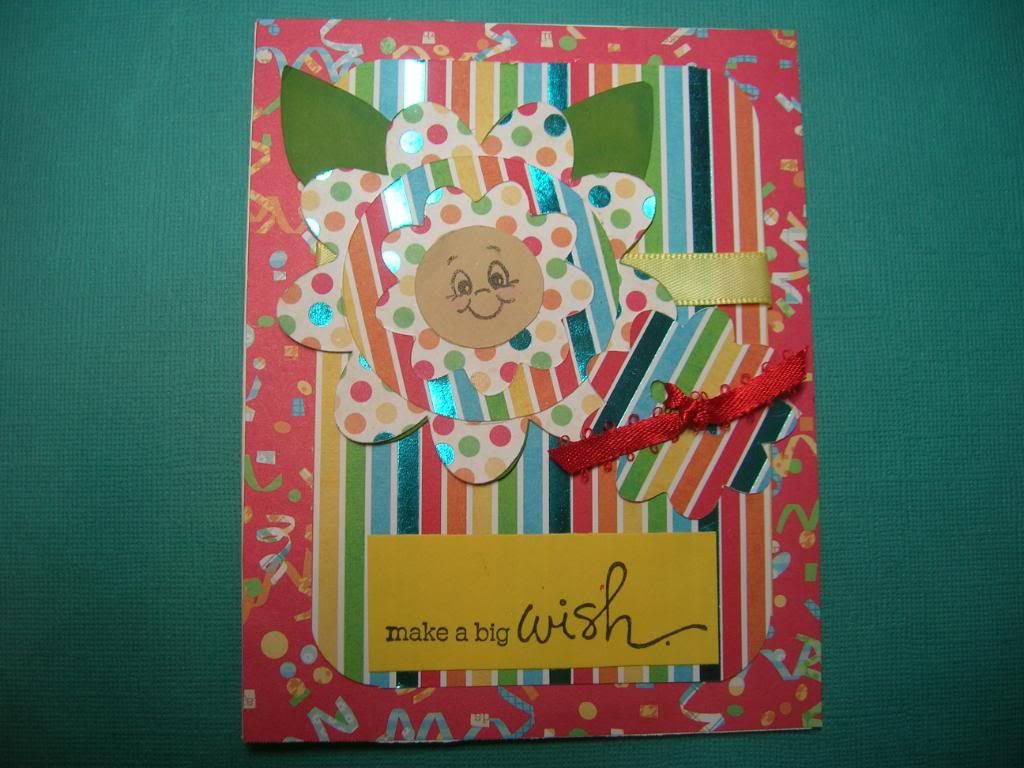
The last cards was also from Simply Charmed page 39.  There are two very cute flowers on this page that are great with Peachy Keen Stamps.  This card was made from scrap paper I have from a Celebration stack.  The smaller striped flower is the piece that punched out around face.  So I used it too.  Stamp for $1 bin at Michaels.  
MAG challenge Use only cuts from page 39 Simply Charmed.

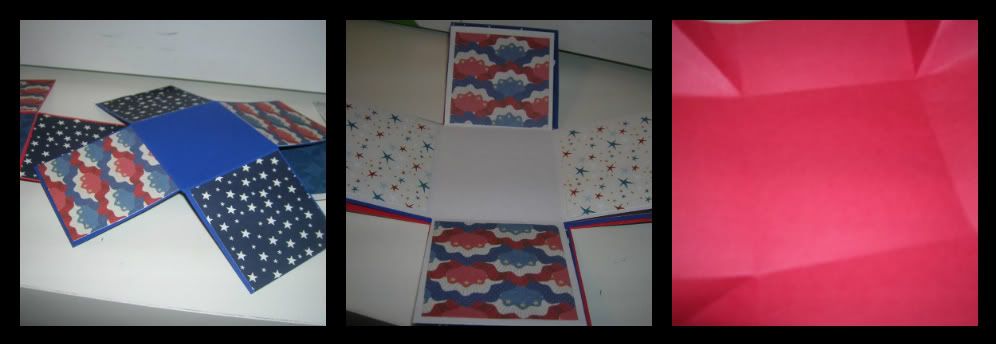
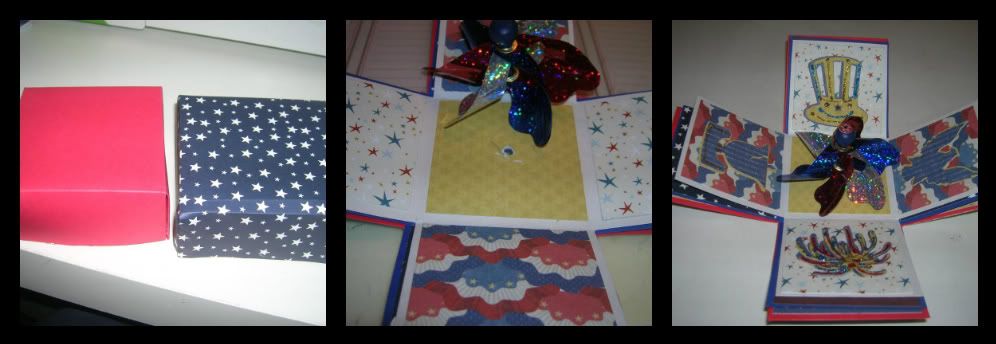
Star Explosion Box

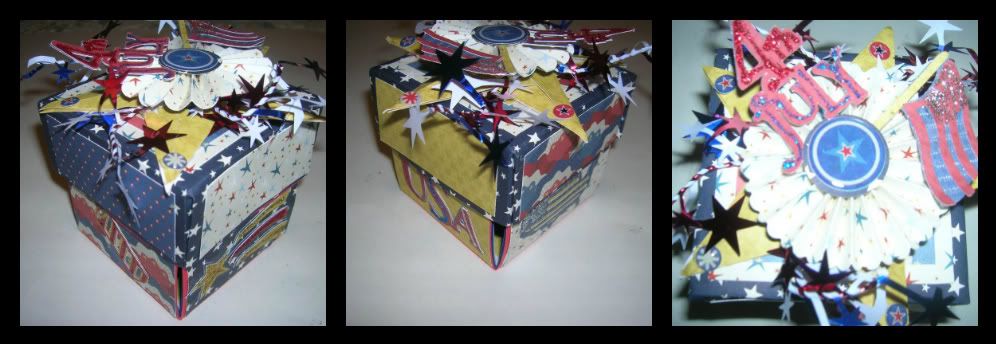
Hello all you crafty bloggers, this is Suzanne from Cricutcraftingrammy. Thanks for joining me on the Sweet Sassy Design Team today.  Hoping you are all have a great Summer and some 4th of July festivities to celebrate the USA.  The challenge for this project  was to use stars not stripes.  This was a good challenge as it is not easy finding paper with stars and no stripes but I managed.  I decided to make an Explosion box with a cute surprise inside. I learned to make these at an LSS class a couple years ago.    Much of the papers used were from K and Company stacks found at Michael's.  

This is three views of the finished product.  Remember you can click on pictures to enlarge.  

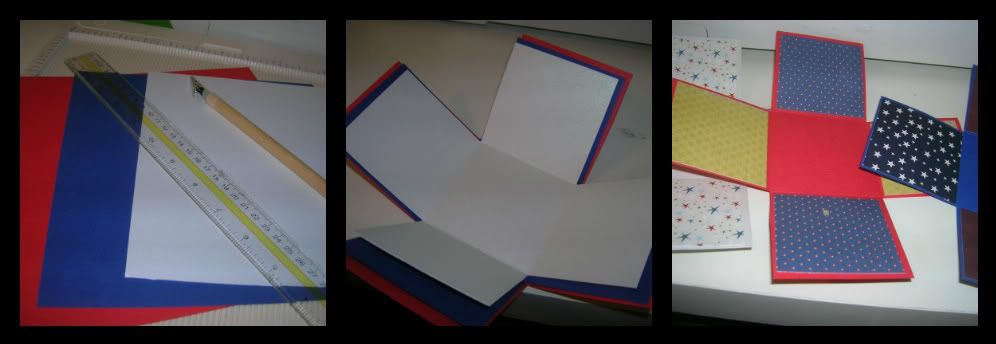
Start out with 3- 12 x 12 pieces of cardstock- I used red, white and blue.
Next you cut them down and score. 
Cut one piece for bottom  9 x 9 and score at 6 inches all sides.
Second piece for center cut to 8 5/8 x 8 5/8and score at 5 3/4 inches all sides. 
The third and top piece cut to 8 1/4 x 8 1/4 and  at 5 1/2 inches all sides.  
You will end up with 9 squares.  Fold to firm scores and then cutout the 4 corner squares.  
 I then use decorated papers in this case stars to decorate the cardstock pages.  Cut the pieces a quarter inch smaller than square so the cardstock color shows through for example the bottom you would cut the pieces 2 3/4" for 3 " square, 2 5/8 for middle and 2 1/4 for top.  

You must decorate the bottom side too but I usually decorate both sides of all 3 pages.  Next you glue the three on top remember to put them in size order.  Glue only the center piece.  I use my ATG gun here.  
Next we start with the lid.  The lid is 6 1/4 " x 6 1/4 "  and is scored at 4 3/4 ".  The diagonally score the corners and fold them in and glue with a good firm glue.  I use Beacons 3 in 1 and once they are glued flat to sides I clip with bull clips or clothespins till they dry.  
 For embellishments and the surprise inside I decorated the lid making another lid and scoring at 4 5/8" to cover first lid. The side strips on lid were cut at 3 x 1 /4 ". I also decorated the top inside of the box lid so when it is opened it looks more finished.  I then punched a hole in center and added the top part of a small pinwheel I found at Michael's.  I glued this tight and then covered bottom of box  with paper so it didn't show.  I then got out my Stand and Salute and cut out a variety of cuts I liked at 2 inches or smaller to fit on fold outs, sides and top of box.  If you want you can also add stamps and or pictures to these.  
For the top I added the dimensional star cut page 32  from Stand and Salute.  I cut it twice at 4 1/2 inches and glued it so it stayed dimensional.  I added a rosette I made with Tim Holtz rosette maker and my Cuttlebug and then a couple more cuts, some stars on wire from Michaels, and an embellishment from a K and Company kit at Michaels.  
These boxes are a lot of fun to make for any occasion.  
I  hope you enjoyed the project and would love to hear your comments.  

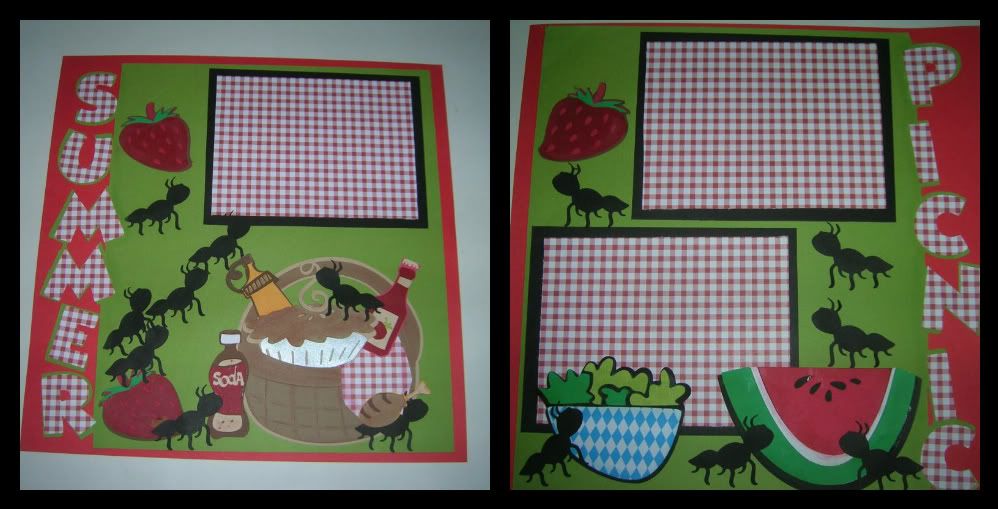
Summer Picnic layout for CC challenge

This is my entry for the Cricut Circle Monthly Challenge. 

JULY MONTHLY CHALLENGE: Let’s Eat Challenge!

One of the best things about the summertime is the opportunity to have meals and family gatherings outside! This month, we want you to create something with a BBQ, Picnic, or Patio theme, AND a gingham or check pattern.


Sad to say this is the last project I did with my beloved Gypsy before I had to send her into PC yesterday.  The title of this layout is Summer Picnic.  The table red and white check paper I got at Joanns.  
For the title I used Mickey Font at 1.87 and welded it to a square to make the page.  I then cut the letters out at 1.67 in the check material.
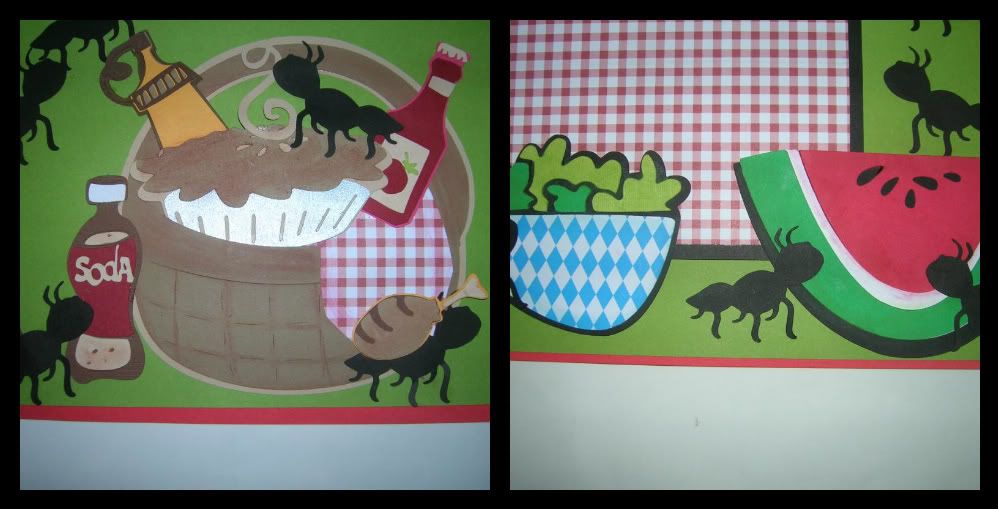
Basket is from My Community at 5 inches.  I added the check for the look of a cloth and it was hand cut.
The ants are from Nates ABC cut at 2 inches.
Chicken leg Everyday Paper Doll 2 inches, Strawberry Country Life 2 inches, Cuts from Block Party-
salad 3 inches, watermelon 3 inches, mustard, ketchup, soda 3 inches and pie 3 1/2 inches.